bestlong 怕失憶筆記

當健忘由隨機逐漸趨向常態時,作筆記是非常必要的

Entries for the ‘MIS’ Category

萬用開機光碟 Hiren’s BootCD 減輕維修工作負擔

Hiren’s BootCD:All in One Bootable CD which has all these utilities

內含大量工具,下面列出程式集的分類清單:

Partition Tools
Backup Tools
Recovery Tools
Testing Tools
RAM (Memory) Testing Tools
Hard Disk Tools
System Information Tools
MBR (Master Boot Record) Tools
BIOS / CMOS Tools
MultiMedia Tools
Password Tools
NTFS (FileSystems) Tools
Browsers / File Managers
Other Tools
Dos Tools
Cleaners
Optimizers
Network Tools
Process Tools
Registry Tools
Startup Tools
Tweakers
Antivirus Tools

真是維修人員出門在外必備良碟。

http://www.hiren.info/pages/bootcd
下載到這裡 http://www.hirensbootcd.net/

Leave a Comment

如何用 ftp 來測試網路傳輸速度的 Script

自己的網路是使用 SeedNet 的

總是會想網路的頻寬是否有在正常狀態下
剛好 ISP 有提供透過 ftp 傳輸檔案來測試速度的服務
所以在 Linux 中寫 Shell Script 來自動跑測試流程
並將測試結果 Mail 給管理者

1
2
3
4
5
6
7
8
9
10
11
12
13
14
15
16
17
18
19
20
21
22
23
24
25
26
27
28
29
30
31
32
33
34
35
36
37
38
39
40
41
42
43
44
45
46
47
48
#!/bin/bash
#
# SeedNet Speed Test
#
SENDMAIL="Y" # Y or N
MAILTO="xxx@xxx.xxx"

LOGFILENAME="SeedNetLanSpeedTest.log"

### 開始
cd /tmp
if [ -e $LOGFILENAME ]
then
   echo -n > $LOGFILENAME
fi

### 用 ftp 測試上傳與下傳速度
ftp -nv >> $LOGFILENAME 2>> $LOGFILENAME <<EOF
open pftest3.seed.net.tw
user ftp ftp
hash
get 10m.dat
cd upload
put 10m.dat
bye
EOF


### 取得傳輸速度
## 10485760 bytes received in 7.6 seconds (1.3e+03 Kbytes/s)
## 10485760 bytes sent in 45 seconds (2.3e+02 Kbytes/s)
echo -n > mail.log
sed -n -e '/seconds/p' $LOGFILENAME >> mail.log

### EMail 傳輸速度報告
if [ $SENDMAIL = "Y" ]
then
   mail -s "SeedNet Lan Speed Test Result" $MAILTO < mail.log
fi

rm $LOGFILENAME
if [ -e "mail.log" ]
then
   rm mail.log
fi
if [ -e "10m.dat" ]
then
   rm 10m.dat
fi

真的太久沒寫了,有任何建議請指教。

手動執行後應該要收到 Mail 內容如下:

1
2
10485760 bytes received in 7.5 seconds (1.4e+03 Kbytes/s)
10485760 bytes sent in 41 seconds (2.5e+02 Kbytes/s)

然後加入到 Cron 中定期執行收報告就可以了。

Leave a Comment

VNC Server + SSH Tunnel

想操作遠端的 Linux 桌面就架設 VNC Server 來用
然後考量連線安全,再透過 SSH Tunnel 來連線
久久設定一次都找網路資料,還是簡略記錄過程

首先安裝 VNCServer 服務

設定 /etc/sysconfig/vncserver 設定檔,以要讓 bestlong 帳號登入為例

1
2
VNCSERVERS="2:bestlong"
VNCSERVERARGS[2]="-geometry 1024x768 -nolisten tcp -nohttpd  -localhost"

其中的 2 就是設定成 5900 + 2 當連線的 Port

接著登入 bestlong 帳號用 vncpassw 建立連線密碼,這一步驟沒做會導致 VNC Server 無法順利啟動

1
2
3
4
[bestlong@www ~]$ vncpasswd
Password:
Verify:
[bestlong@www ~]$

啟動 VNC Server 服務 /etc/init.d/vncserver start

1
2
3
4
5
6
7
8
9
10
[root@www ~]# /etc/init.d/vncserver start
正在啟動 VNC 伺服器: 2:allen
New 'www.bestlong.idv.tw:2 (bestlong)' desktop is www.bestlong.idv.tw:2

Creating default startup script /home/bestlong/.vnc/xstartup
Starting applications specified in /home/bestlong/.vnc/xstartup
Log file is /home/bestlong/.vnc/www.bestlong.idv.tw:2.log

                                                           [  確定  ]
[root@www ~]#

在 SSH 完成連線並登入
接著設定 Putty (or Pietty) Tunnel

1
2
3
4
Source port 5902
Destintion localhost:5902
Local
Auto

然後就可以用 VNC Client 連線
要注意先前設定的 ssh 在此時必須是連線狀態 Tunnel 才會存在
連線到 localhost:2 並輸入密碼就可以看到一個簡單的桌面

這是因為所產生的設定是預設使用 twm 視窗管理員
當然也是可以改為 GNOME 或 KDE 的
請修改 $HOME/.vnc/xstart 檔案
以 bestlong 帳號來說路徑就是 /home/bestlong/.vnc/xstart
預設內容是

1
2
3
4
5
6
7
8
9
10
11
12
#!/bin/sh

# Uncomment the following two lines for normal desktop:
# unset SESSION_MANAGER
# exec /etc/X11/xinit/xinitrc

[ -x /etc/vnc/xstartup ] && exec /etc/vnc/xstartup
[ -r $HOME/.Xresources ] && xrdb $HOME/.Xresources
xsetroot -solid grey
vncconfig -iconic &
xterm -geometry 80x24+10+10 -ls -title "$VNCDESKTOP Desktop" &
twm &

修改成為

1
2
3
4
5
6
7
8
9
10
11
12
13
#!/bin/sh

# Uncomment the following two lines for normal desktop:
unset SESSION_MANAGER
exec /etc/X11/xinit/xinitrc

[ -x /etc/vnc/xstartup ] && exec /etc/vnc/xstartup
[ -r $HOME/.Xresources ] && xrdb $HOME/.Xresources
xsetroot -solid grey
vncconfig -iconic &
xterm -geometry 80x24+10+10 -ls -title "$VNCDESKTOP Desktop" &
#twm &
gnome-session &

修改完後重新啟動 VNC Server
然後重新用 VNC Client 連線就可以看到 GNOME 桌面了。

Comments (1)

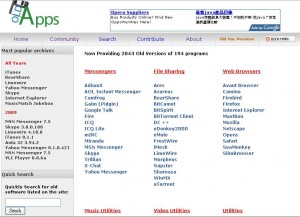
軟體新版不好用,OldApps.com 提供舊版給你

懷念舊版軟體嗎?可以到這個網站找看看有沒有

http://oldapps.com/

oldapps-logo

oldapps

Leave a Comment

kernel: CPU0: Temperature above threshold 過熱?

每日例行檢查主機發現一直出現下列訊息:

1
2
3
4
5
Message from syslogd@www at Thu Jun 11 15:53:46 2009 ...
www kernel: CPU0: Temperature above threshold

Message from syslogd@www at Thu Jun 11 15:53:46 2009 ...
www kernel: CPU0: Running in modulated clock mode

這樣的訊息多數碰到的人都是在進行大量運算或是散熱不良所導致。但我確認當時主機中沒有進行任何的高負載工作,就算是有,以往也沒有出現過此訊息。

心想還是盡快停機作檢查,結果發現原因如下圖:

P1070198

P1070199

P1070200

這是CPU風扇扣具的固定座,可能是材質有問題而斷裂,造成散熱鰭片一角翹起而與CPU不夠密合影響散熱。幸好有即時拆機檢查。不然把CPU給燒掉就麻煩了。

Leave a Comment

  • 工商服務

    廣告讀取中...
  • 近期留言

  • 標籤

  • 彙整